Monday, September 26, 2011

A question of spikes ...

Gordon Dobson once again brings up a question, well actually he brought it up on Model Rail Radio and just reminded me that I had promised pictures. The issue was about what spikes I was using. I said Micro Engineering, but that I had to cut the head of the spikes to use them, which was taking a lot of time. Here are a couple photos demonstrating why it is necessary.


In the left photo, you can see an unmodified spike on the left and the cut spike on the left. The unmodified spike head is 1/8 of an inch, or 6" in O scale. Even better, it's 1 foot in HO. The cut head is about 1/16, still too big, but better, at least.

On the right, the modified spike is on top and the unmods are below. The width is also adjusted to look better.

I have a supply of these spikes, and thus I am using them. Many times, I have been using relatively unmodified spikes on the back of the rail, since it can't be seen. (Yes, even I will do the "good enough" thing if it really is feasible.)

Technically, the best spikes are the ones from Proto 87 stores, but they are pricey and take a while to get. They also can be a bit of a pain to work with, but the pliers I am using do help in that regard. 

Saturday, September 24, 2011

Self Guarded Frog ...

This is something that I would really like to have, but is not available in P48 (or anywhere else for that matter) is the cast manganese self guarded frog. Here's the photo for Jason on the Sept 24, 2011 Model Rail Radio ...

Yes, I am crazy ...

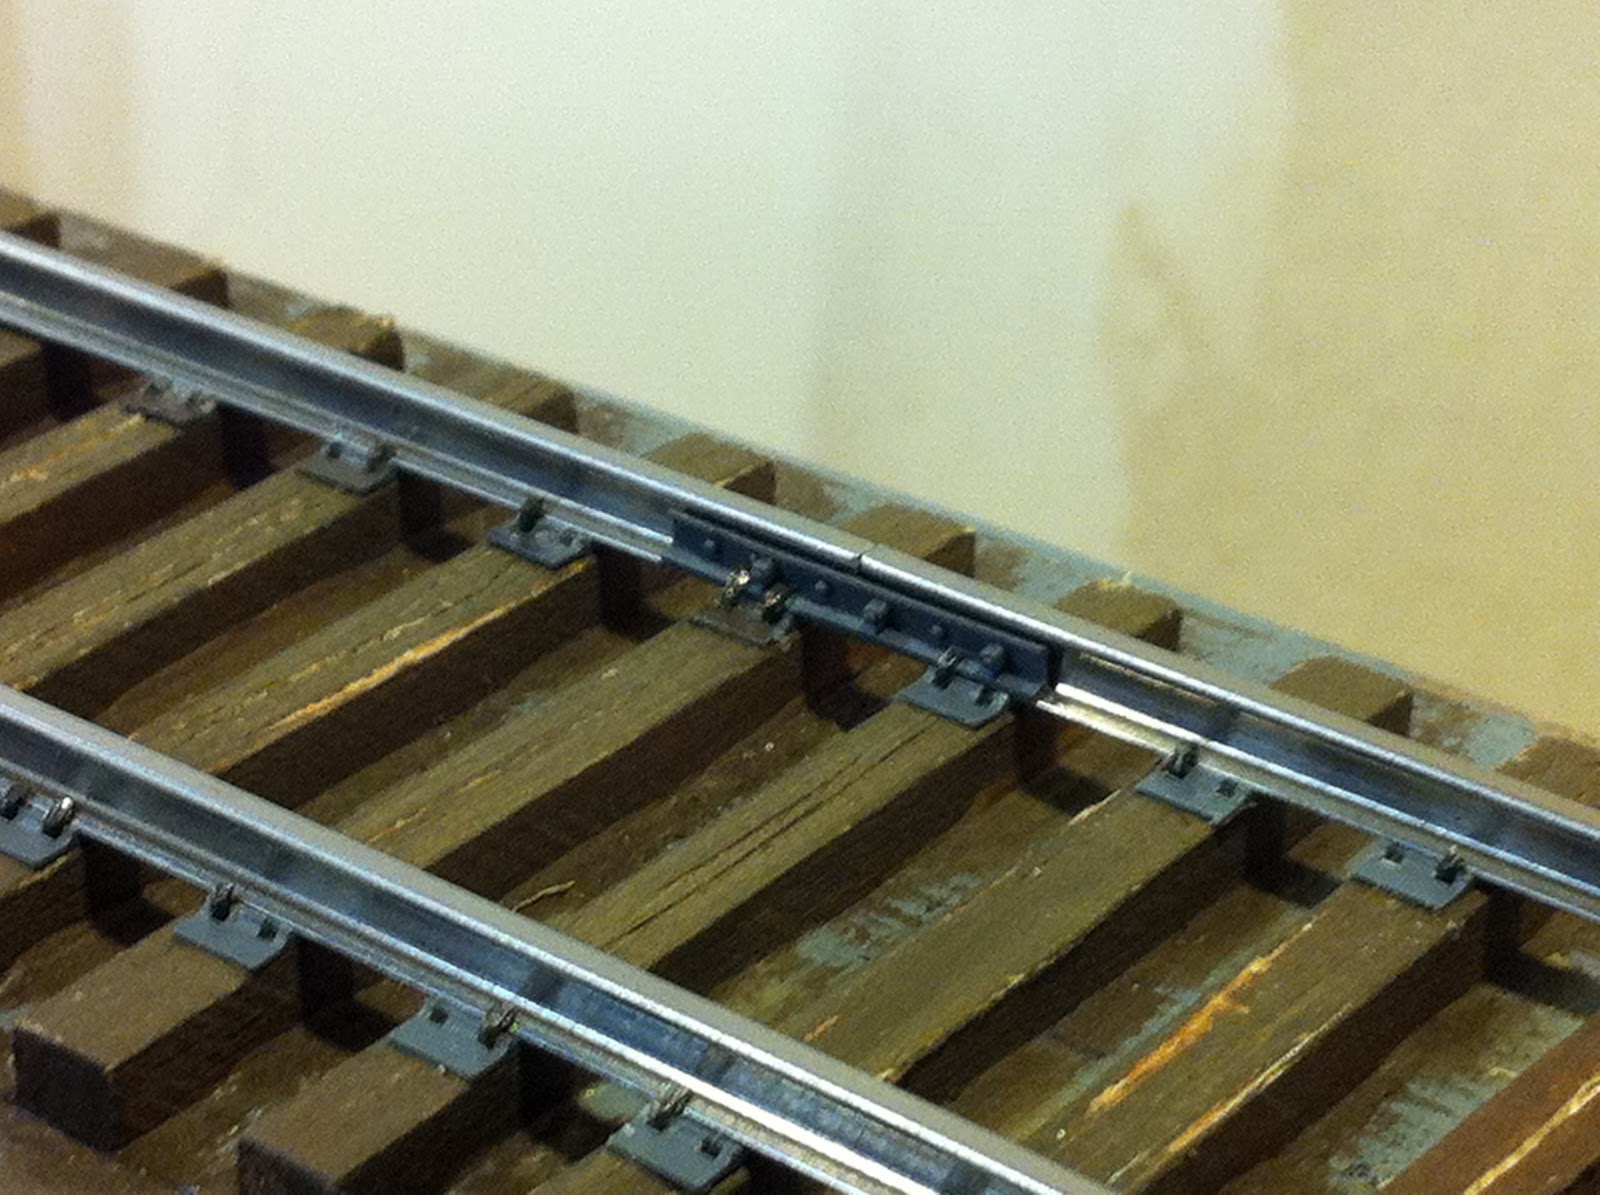
But I don't think there was any a question about that ... Here of some photos of the new trackwork I have been doing the last couple of days. I have put in two actual joints with the scale 39' rail sections, and I think it looks great, so far anyway ... Here is a bunch of photos, without a lot of explanation ...

 
 Well, as you can see on the left, that is a side view of the first joint, with the lengthwise view on the right. I think it is looking pretty good so far.

The photo below is the joint on the other side in progress and how it looks before the joint bar is installed.

 In the above photo, I hope you can see how the Sweepstick is helping this process.

Well, the photo on the left you can see the track shaping up and in the right photo, I wanted to show how I was tearing up the track on this section. I was not pleased with the fact that the rails were leaning to one side. With the modified Sweepstick, I now had the tool to correct the issue. So up the rail came!
Now on the right we can see some of the distressing on the ties as I have been going. Unfortunately, I don't have access to A&I, because my supply had dried up, so I have been staining these with MinWax ebony stain. You will be able to see some more in later photos ...

These are just a few more photos of the distressing and staining work ...


 Here is just a photo of me using the small stainless steel wire brush. It takes a bit of elbow grease to get a good level of grain, but as the photo below brings out, I really think the effect is excellent. The grain appears to be pretty close to prototypical as for relatively new ties.

These are still going to recieved a lot more weathering before they are going to be dubbed "done." I will hit it with another color of stain, as this is really meant to just pop into the grain to push it to the fore ...


Friday, September 23, 2011

A Little Explanation ....

Well, Gordon sent me a good question. What I might think is self evident, obviously isn't. In regard to my using a "modified" FastTracks Sweepstick: Technically speaking, a sweepstick is really only billed as being a means for curving flextrack to a specific radius. When I talked to Tim Warris, he did say that they can be used as a track gauge, but that people would jump down his throat if he billed the wooden sweepsticks as a track gauge. Well, in my experience thus far, they work just fine for that purpose. However, they are not without their issues when used in that way ... First of all, here is the unaltered sweepstick that I am using for the 60" radius.


The main issue is that they will drop down within the web of the rail, where they will settle in and cause the track gauge to be too narrow. Hopefully this photo will help ...


I modified the one of the two sweepsticks by placing O scale ties along the centerline, like so ...


The ties do two things, first of all, they keep the sweepsticks from dropping down into the web of the rail, thus permitting them to be used as a track gauge. The second thing is that since they are centered, they allow me to lay the rail in the right spots on the ties. I have always had a tendency when handlaying track to "lean" a little to one side. While for most people this is not ferociously noticeable, I am not most people and when viewed from the right angle, the lop-sidedness becomes pretty apparent. This was something that I picked up on when reading Mike Cougill's book on hand laying track. He uses a three point gauge that is the width of the ties. It is a ferociously simple solution, that, to be honest, I probably wouldn't be able to apply in my case without using it on the sweepsticks. Of course, with the milling machine, I would be able to mill out a gauge of this type, well, were I to do that ... I would have to make a different gauge for each rail size if they are to be done correctly, since the rail head of each code of rail is a different size. Thus, if you want to make sure that the gauge remains correct, you need to have a gauge sized to each rail code. P48 3-point gauges are ferociously expensive and I already have a set of two for code 125, which I don't like to use. The sweepsticks, on the other hand, allow you to maintain a nice flow to the rail without that "wavey" look which is very unprototypical.

So, now, here is a photo of this little section of rail/track that I have put in the tieplates into ... now if only I could find my joint bars ....


The only problem is that the rest of the curve that has been laid already, has that lean ... grrrr. I really do need to get after distressing the other ties, though.

Thanks for the question Gordon! Sorry for not being more explicit.

Trackwork ...

Here are a few photos of the trackwork. It is going slowly partly because of the spikes that I am using and partly because I am trying to be extra careful since this is going to be on the end of the "module." Since I am going for radio control with batteries, I am not concerned with having individual 39' lengths of rail. One of which is half that because of being at the joint, of course.

Adding a little bit of coloring ...

Using the modified FastTracks Sweepstick as a track gauge

Spiking is coming along, but there is a small problem ...I forgot to distress the ties!

After distressing the ties, I moved the rails back into position. The ditressed ties are the discolored ones past the end of the short length of rail ...
And that's where things stand at the moment. I don't have to wake up at 4am tomorrow, so a little more time can be spent working on this tonight ... maybe.

For those of you who listen ...

I have, on more than one occasion, mentioned my dogs, Titus and Harrison. My mother has been bringing them with her when she comes to pick me up at the train station when I come home on my release. This is who waits for me when I come home:


They certainly brighten my day!

Conversely, they also wait in the window and watch me leave when I go back to work, which is a killer ...

Little by little ... and some photos!

Well, I have been tryinh to get a little bit done every night, but it is extremely slow going as I am using spikes that need trimming before use. What with 4 spikes per tie minimum, this is taking some time.

First off, here are a couple photos of the slide cover glass that I got in the mail the other day:


It is amazingly thin! I am looking forward to starting up the GP9u project again and this was one the items that was holding me back. They are just large enough to work as the windows in the locomotive.