Saturday, December 3, 2011

Decrepidizing ties ....

I just made up that word, at least I think I did. Well, in the last post I had a crummy photo of the monitor that showed the abandoned track alongside the Delaware Lackawanna. Since I am trying to model the Cresco, PA area pretty faithfully, I really wanted to model a very decrepit right of way.

One of the first things is that rotted ties have a tendency to appear hollow, well, how would you do that? If you dig out from the top, while it might look okay, it won't look hollow. So I was able to start out doing these first five ties ...


So here are the ties after installation on the layout and application or Miniwax Ebony stain, a little bit of ballast and the addition of weeds. The weeds are paint bristles off an old paint brush that had been stained white already ...


I put the first ties down with carpenters glue, but then I remembered that I had pre-colored as per the directions on Joe Fugate's videos on scenery. That is the grey material above the unstained ties ... I did this to use as cement for the ties, but to also have them appear to be sunk into the earth ...


My process for adding the weeds is pretty slow ... I put a bottom layer of Aileen's Tacky Glue, then put in some ballast to help hold the paint bristles upright and then adhering that ballast with Future Floor Wax.


I added in a couple sprigs of Super Trees materials that I spray painted with grey spray paint and then glue some cigar leaves.


I hope you enjoy the photos and I hope to get more frequent blog updates .

A needed detail ....

One of the things that I believe is sorely lacking on model railroads is that omnipresent ground cover ... leaves. They are everywhere, at least they are nowadays. Here are a couple photos illustrating my point. The first is pretty bad as it is a photo of the computer screen, but it was the best photo I had available and the second is a better one.


If you notice, leaves are everywhere, so the question is, how does one model leaves? Well, some people have tried using real leaves, the problem is that real leaves are too thick. So, I tried torn up cigar leaves ... I think that it turned out exceptionally well ...


That's the torn up leaves and the result is in the two photos below ...


The only problem is that I have to tear up a gagillion more leaves .... ugh.

Work has continued, but posts haven't ...

I am very sorry for the lack of posts, but my internet connection is sometimes a little sketchy. So, while I might have time to do a little work on the railroad (the model one), it is much harder to get posts out as you all might want.

I will start off with some posts that have gone out to the Model Rail Radio mailing list, but I have not posted here. That happens because I take the pictures with my iphone and I am able to send them to the list from that. Whereas, I am not able to send photos to the blog from my iPhone, or at least it has been sufficiently difficult that I have not pursued it.

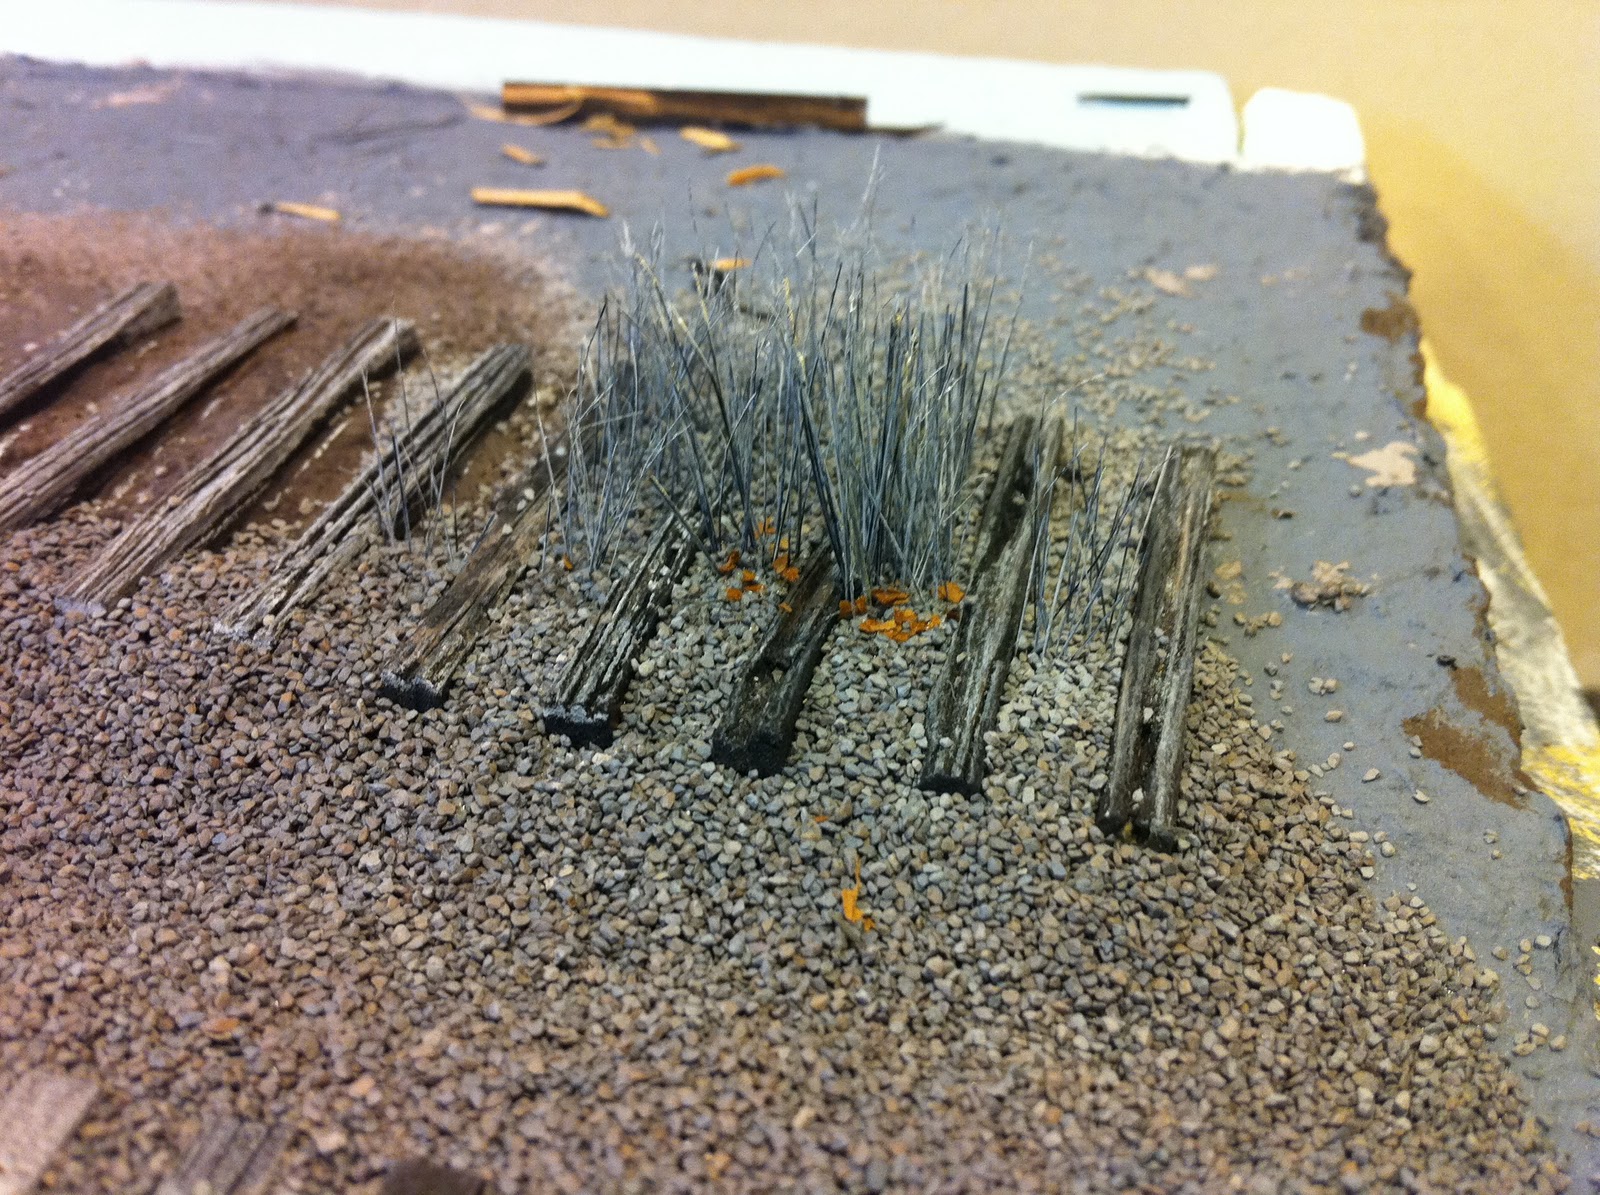
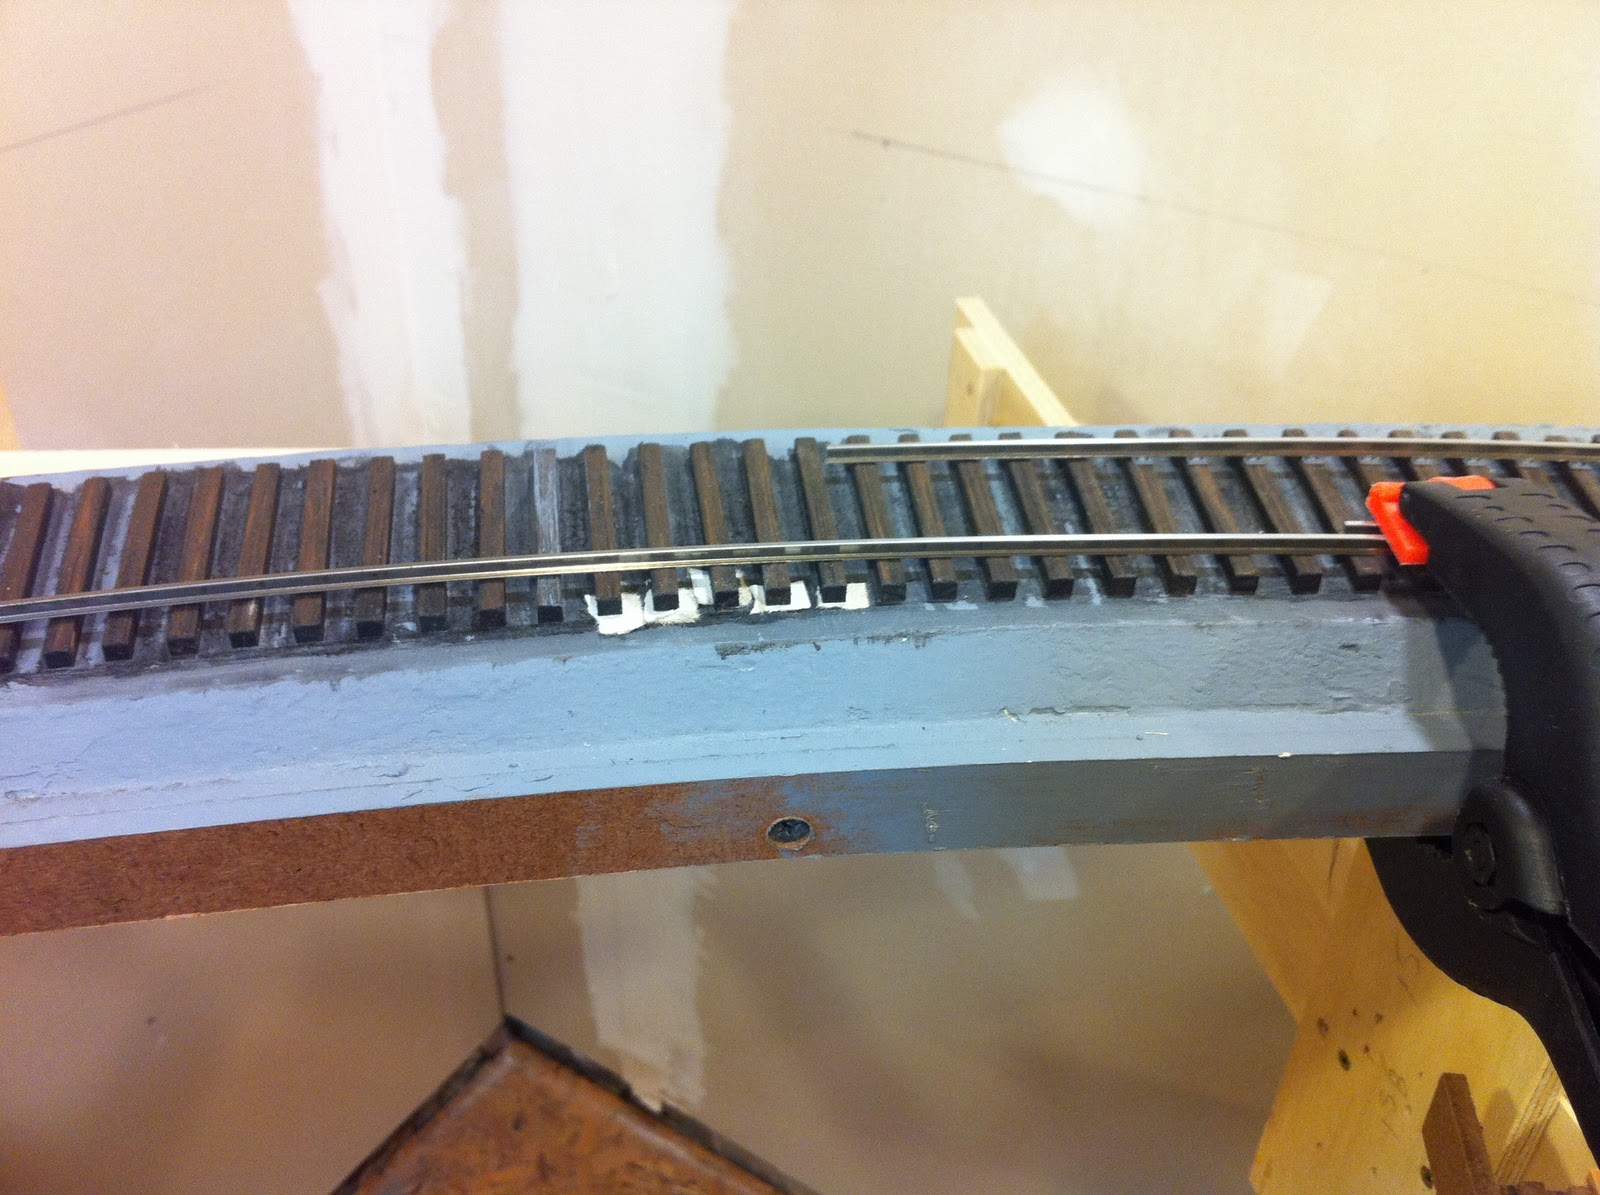
Anyway, I have been working on the abandoned track that is going to run alongside the main line here and I have been moving along slowly, but then again, I always do ...

So this all makes sense, I am going to post bits and pieces, instead of loading it all into this one post.

Well, just so you all know, I went down to Craig Bisguier's this weekend on then Acela. It was a late afternoon train and I was able to get this photo with my iPhone as we tooled along at around 100mph.


I never cease to be impressed with the camera in the iPhone. It takes about the best model photos I have ever taken and there is no way in the world I could have gotten a picture like the above with my other cameras, at least not without a lot of prep, that was just fired out the window.

When I arrived, Craig's wife picked me up at the train station in Clifton, NJ and brought me over to his friend, Dave Ramos' house for the operating session that was on going when I arrived. It was very cool and I had a great time, even though the engineer I worked with first only killed me about 4 times ... It only hurt a little.

Today, Craig and I drove out to Scranton, PA to get research photos to help me with my Delaware Lackawanna modeling. We started out in Steamtown, where we both bought t-shirts at the store and then were greeted by CN 3254 being turned on the turntable and then backed onto a string of 6 coaches.

That photo was taken later, in Moscow, PA. After visiting the DL shops, where we saw a number of the stable outside, including 2452, and various others, as well as the rather impressive deadline, we decided to chase 3254 to Moscow, as that is in the direction of Cresco, PA, our ultimate destination. We were assured by one of the trainman that we would have no problem chasing her as she would only be going 25 mph up the hill ... Well, due to several factors, we got smoked (no pun intended) It is very difficult to believe that they were only going 25 ...


 After spending some time in Cresco getting lots of photos, we were greeted by PT-98, which we chased towards the East, which just happens to be towards Craig's ... very convenient. I think this bridge needs to be modeled ... But then again, I want to model everything ...

Modeling updates are to follow ...

Friday, November 11, 2011

Believe it or not ...

Work has actually taken place.

I had gotten a tiny bit of work done since the last post in time for Craig Bisguier, Jeff Adam and Lee Weiss to come over during the lunch break from CSC11 on Saturday and take a look at my 3 feet of track and benchwork. The railroad has been taking its toll and it really does not allow me the time or energy to work on the layout. That changed this week as I have been working later in the day instead of bright and early in the AM. This appears to be kinder on the body's clock, as it were ...

I set about finishing the stretch of track, which is done, basically ... I also set up the frame for my backdrop.
To hold the styrene that I am using in place, I don't plan on using adhesive, but I made clamping blocks using 1x2 lumber that I cut a .060" slot into with a table saw.

  
Since I wanted to see if this was actually going to work ... I tried the unpainted styrene in place. Unfortunately, the sheet that Mike got is only 6' long not 8'. It still wouldn't have fit totally, but there would have been less splicing for me to do ...

For those of you asking: "Why use the blocks? You'll be able to see them! Really? Normally, there will be scenery hiding the bottom edge of the backdrop and the top should be hidden by any valance I put up. It also allows me to take the backdrop up and down much easier so that I don't have to reach over the module to paint it.


Since I really don't trust styrene to hold latex paint, I brought the sheet outside and primed it with a white paint spray bomb from Wal-Mart. Great paint, if you can get it.


Ideally, I think that I would like to model early/late November, possibly in the middle of a snow flurry ... tricky, but I got the idea after looking at this backdrop from Troel's Kirk ... Too bad I'm not a landscape artist like he is ...


That being the case, you all might be wondering about the next few photos, where I am going after a blue sky backdrop ... But it is the easiest to to with the amount of experience that I have, which is none ... So, I went to Lowe's to get some sky blue paint ... But I got tired of taking paint cards outside to look at the perfecgt blue sky, so I took this photo ...


And I came home with this color, as is seen after initially painting the styrene ...


So, here is the backdrop up, but not fastened in place ... I just wanted to have some color behind what I was doing ...


I think it certainly makes a big difference!

Tuesday, October 11, 2011

Wupped ...

Well, for those of you that are actually following this ... not really much has happened in the last week except work. I have done a little ... very little, since I hve worked the last eight days straight. On Sunday, I took a train here:

 That's Gillette Stadium, home of the New England Patriots. A place where I live 10 minutes away from and have only ever been to one event here ever, and not when it was the new stadium. I avoid it like the plague during game day, unless I am being paid to come here, that is ...

I found this interesting artifact adjacent to the Whitman commuter rail station ... the old turntable pit with several tracks still there, apparently restored and maintained, very cool!


Now here is another example of why the camera on an iPhone is so cool ... try THIS with an SLR. This photo was taken handheld, no tripod ... It never ceases to amaze me ... Actually, the photo I took resting the phone on the back of my car to steady it, came out worse! Oh, this is the Rhode Island state capitol building in Providence, RI.


That same day, Saturday, instead of going home on my release, I went over and toured the USS Constitution, which is across Boston Harbor from South Station. A 10 minute ride by water shuttle, which was free, being a MBTA employee (sort of), although it is normally only $1.70 for the same ride ... which amazed the two tourists from Toronto, Canada that I met in line waiting to go through security at Charlestown Navy yard ...


Here is a look at the gun deck of the Constitution, one of the crew members (yes this ship is still commissioned in the U.S. Navy and naval officers serve 2 year tours of duty aboard her) stated that while Constitution was listed as a 44 gun ship, she never went out with fewer than 50.


A very interesting day, we had beautiful weather, for October (actually for anytime), just about 80 degrees and not a cloud in the sky.

Saturday, October 1, 2011

Dealing with another dip ...

And it isn't me, thank you very much, Clark. I had another dip in the roadbed that I got about to repairing today. The first two photos show how much of a dip there was. What I did was to take a piece of rail, one of the good thing about using code 138 steel rail (yes, steel, not nickel silver) is that it has a tendency to want to stay pretty straight/flat. I used the rail as a gauge to know which ties to raise and by how much. You can see that the dip is pretty sizeable ...


In the next photo, I have started to shim the lower ties up to the level of the rail "gauge." The clamp is holding the rail in place so this actually works ...


The ties on the other side were also dipped down, but not as badly, so I repeated the process for the other side as well and added in the missing ties to complete the section ...


Now I just have to wait for the carpenters glue to dry ...

Friday, September 30, 2011

Looking to the Future ...

Well, per a request from Mike Rose, I ballasted a little bit of track, using Future Floor Wax, of course! It worked well as usual, here is a photo of the finished product ... well, sort of, I am still waiting for the Future to dry so I can paint the rail ...


I took this video with my iPhone of the Future application and how easy it is. Unfortunately the microphone on my iPhone is not working, so there is no sound ... not that there was a lot of sound involved in this ...
You will be able to see the Woodland Scenics ballast crater, and then level out and then the Future flow through the ballast, without a wetting agent! And if you listen to the September Scotty Mason show, you will be able to hear Jimmy Simmons talk about some of the other things that Future can do.


Once again, progress... Okay, not much ...

Well, I spent alot of the day today working on the layout. Why, well, because I got displaced off of my regular job onto the extra board again ... ah well. Anyway, I have done some work on the layout.

First off, I sanded and painted the rest of the roadbed on the section that I have up ...


 Well, the second project was to create a splice plate so that I can hold the splines on the next section of layout. Here is the piece I built using a scrap piece of aspen, cutting 1/2" deep notches for the spines with a table saw.


This is the splicer plate installed on the new section. I also installed that tie that you see that hasn't been stained ... That is actually on the second section.


For reference, this is the tie spacing jig that I made out of masonite pieces last year. The width of the masonite strips is such that it allows for a little variation in the tie spacing, just like on the prototype.


I installed a couple tie strips and held them down into the yellow gluw with these pieces of 1/2" plywood and clamps ...


 In this case, it was a good thing that I am impatient, because when I looked at the ties under the block on the left, they had shifted WAY out of position. Fortunately, the glue had not set completely, so I was able to move and reglue them. They are now being held in place three at a time with the clamps.


Oooo, I love it when I get parts in the mail ... I just got these today ... Rail anchors! The last piece of the puzzle as far as the track detailing here goes, but dear lord, I am going to go broke using these things as much as I need to ... They come from the Irish Tracklayer, but I think y'all could figure that out.


And this is what they look like installed .... I really think that they make the track pop ...


And here is a shot of a little more of the track with them installed ...


But wait ... there's more ...